
Our time in Wānaka consisted of hiking the incredible Roys Peak Track, photographing the most photographed tree in New Zealand, and playing monopoly deal with a glass of wine in our accommodation.
This article discusses our experience of hiking the famous Roys Peak Track, which is often regarded as one of the best hikes in New Zealand. We include details of the hike itself, what to bring with you and discuss the best time of year to do this hike.
To find out about everything else that we got up to in Wānaka, you will find that here.
Epic, tough and extremely rewarding, hiking this track was a highlight for all of us on our 10 day South Island road trip.
The name of this peak has some sentimental value to Jess, so if any family members are reading this then know that this hike and this article is dedicated to Grandad Roy.
Table of Contents
ToggleRoys Peak Track
This track was our main event in Wānaka. It took us the whole day, and we managed to make it back down in time to watch the sun setting over Lake Wanaka.
Overview

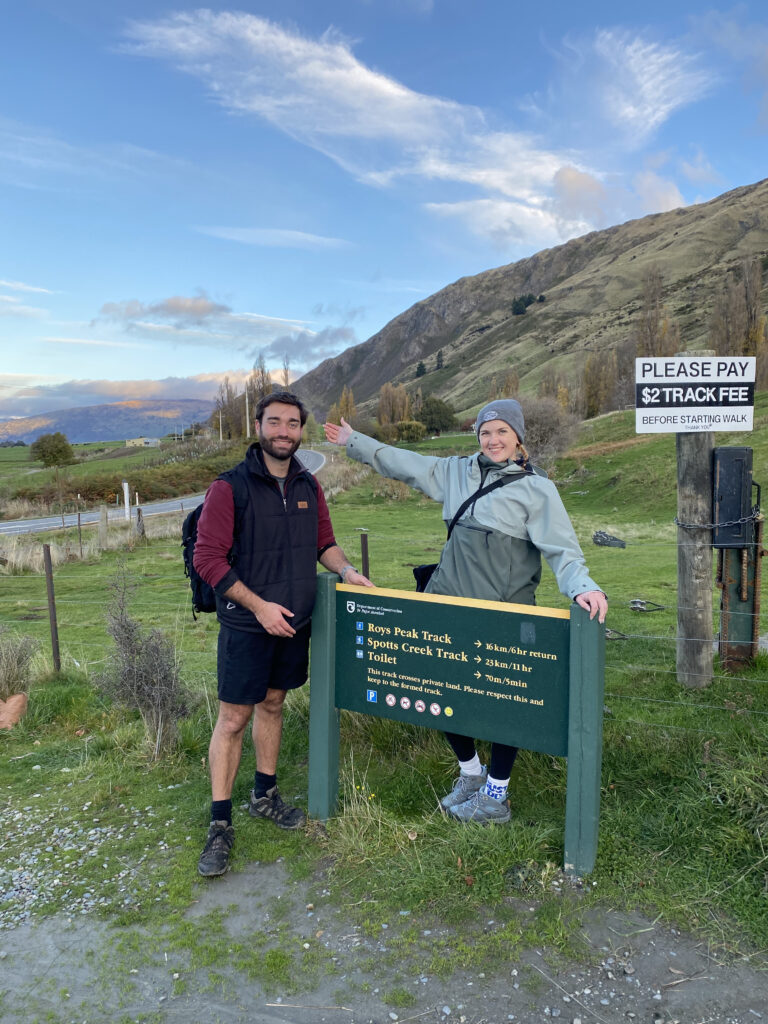
Roys peak track is a 16km round trip, with a rather gruelling uphill ascent. The total incline you walk is just over 1,200 metres, and the views from the top (1,578m) are worth it!
Our total walking time was 7 hours, and this included time at the summit and at the famous viewpoint.
Our Experience of Roys Peak Track
We started our hike at around 10:00 in the morning. This was a suitable time as the hike was estimated to be a 6 hour round trip, giving us plenty of spare time if we needed it. We had to be aware of the sun setting at 17:00 as we did not have any equipment for a dark hike.
We are not going to sugar coat this at all.
It was a brutal ascent.
All of the articles that we read in preparation for Roys Peak hike said this, so we knew what we were in for.
Between breathing, eating, chatting and struggling, we tried to keep a rough list and description of each kilometre. I’ve included some of the actual notes I wrote on my phone at the time, which weren’t too complete towards the end (so we’ve filled in the gaps since).
Kilometre One
You immediately start walking up hill on a steep gradient. This continues for the entire kilometre. There is no easy start to warm you up.
Kilometre Two
You still go strongly uphill until about 1500m mark. It then flattens out compared to the first Km.
Kilometre Three
My notes here are really informative: fairly flat. So, I guess that’s that. (Don’t let these two words deceive you)
Kilometre Four
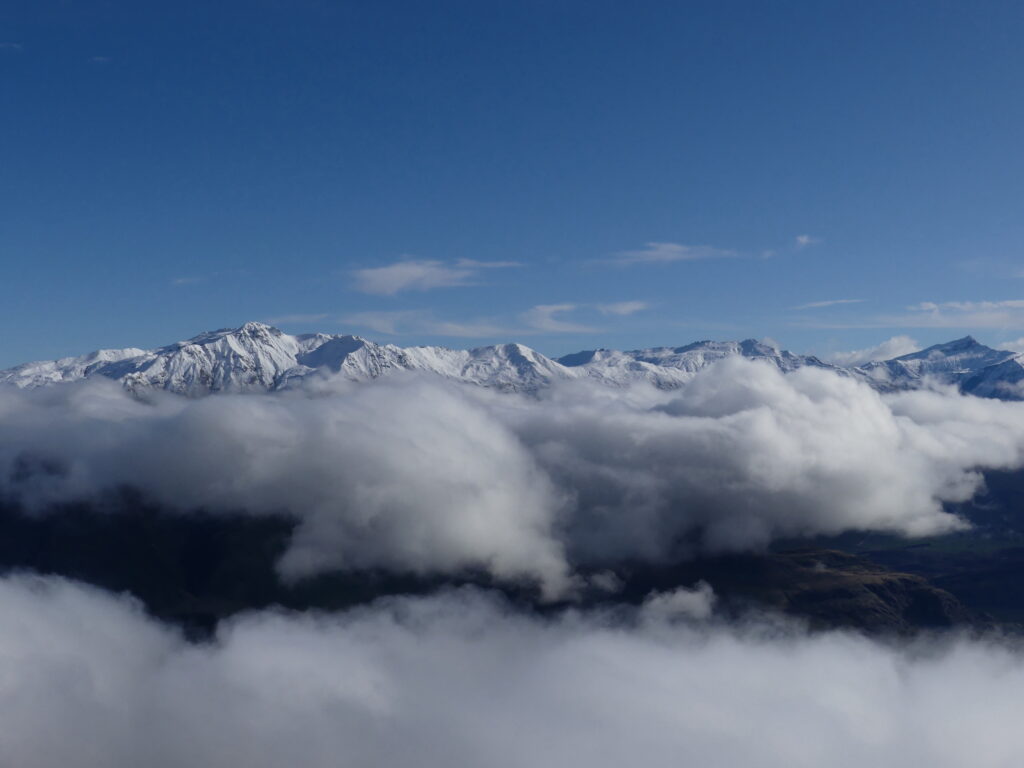
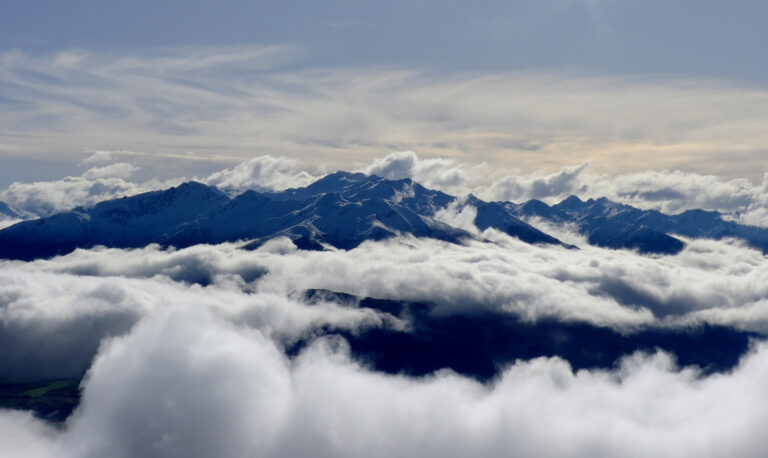
Shock. We return to the uphill slog. Annoyingly, the clouds were out in full force and we literally couldn’t see a thing for most of it.
During this kilometre, we walked through the clouds and poked out in a gap where we could see a bit of the supposedly beautiful mountains.
Kilometre Five
This was a mix of uphill and slight downhill – which we weren’t happy with as it felt like the hill itself was taking away our progress. How dare it. We also really started to feel the wind here, we were pretty high after all.
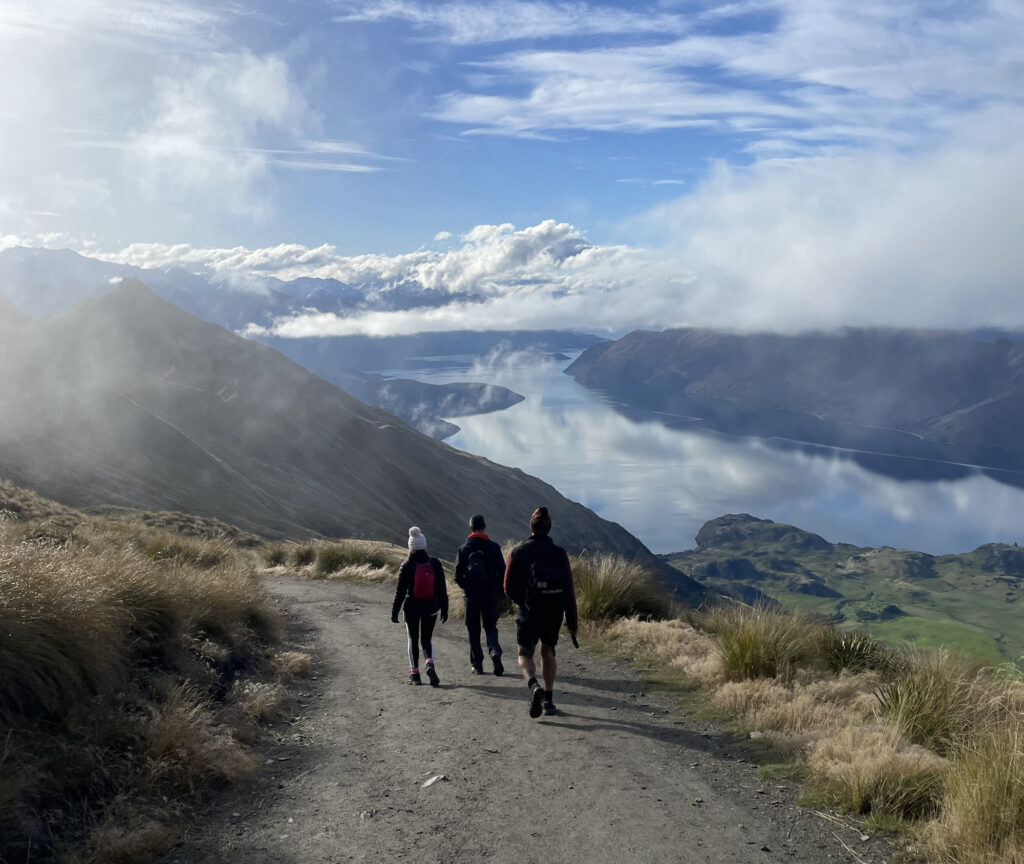
Kilometre Six
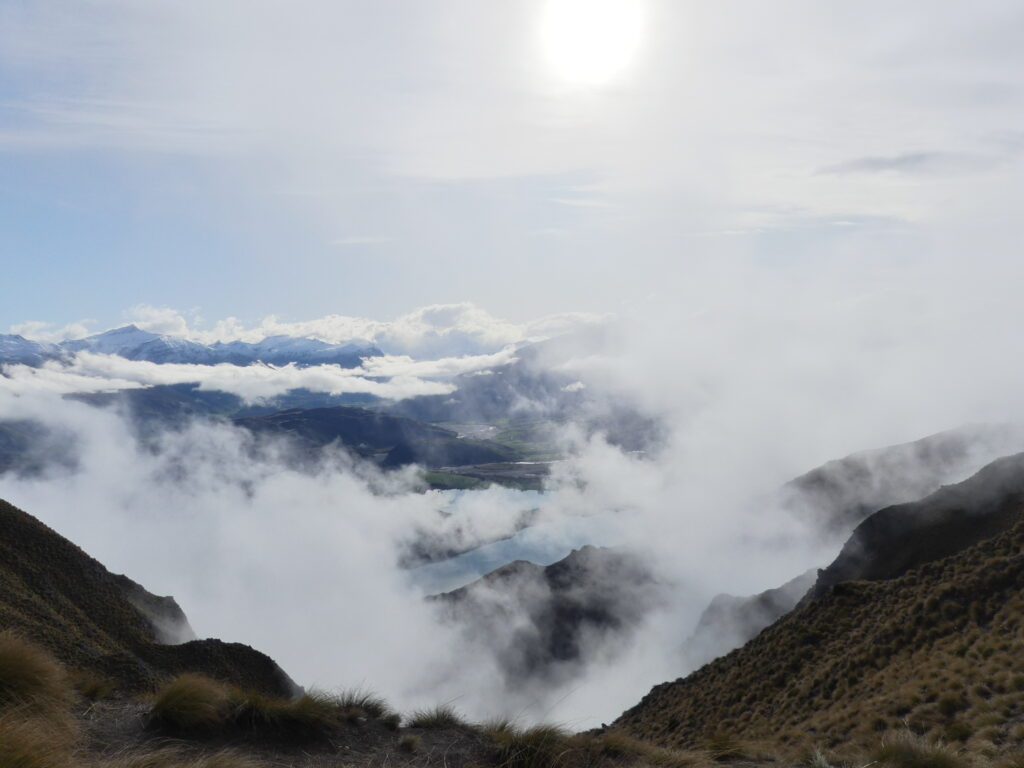
So this one is an important one (even though I have absolutely nothing written). At 6.5km up, you’ll find the viewpoint and famous ‘Instagram’ spot.
This is not the top!
You’ve got 1.5km left until you reach the summit. But it’s a really good spot to dig through your bag for another bottle of water and a high protein high energy snack.
Sadly, for us the clouds obstructed most of our view, but we managed to see some icy peaks of mountains in the distance! My first time seeing something like that, so it was an experience in itself for me.
(Don’t hang around for ages at the viewpoint just yet as your legs will start to cool down and you will come past it again on the decent. Equally if it’s really cloudy like it was for us by the time you’ve got to the summit and back it may have cleared.)
Kilometre Seven
As you leave the path from your break, you follow a sign pointing to the summit. The path here becomes quite rocky and uneven, with loose rocks everywhere.
This was our favourite kilometre as all of the hard work is paying off. There was a light spattering of snow on the ground and thankfully the clouds were below us at this point.
The legs were aching here though and Jess’ hips were sore. Her speed of walking had declined hugely as we kept heading up but that didn’t matter.
The views were epic!
We spent ages dawdling along here taking it all in as well as taking about a million photos.
I’d argue that this area was better than the actual summit. But that’s personal opinion.
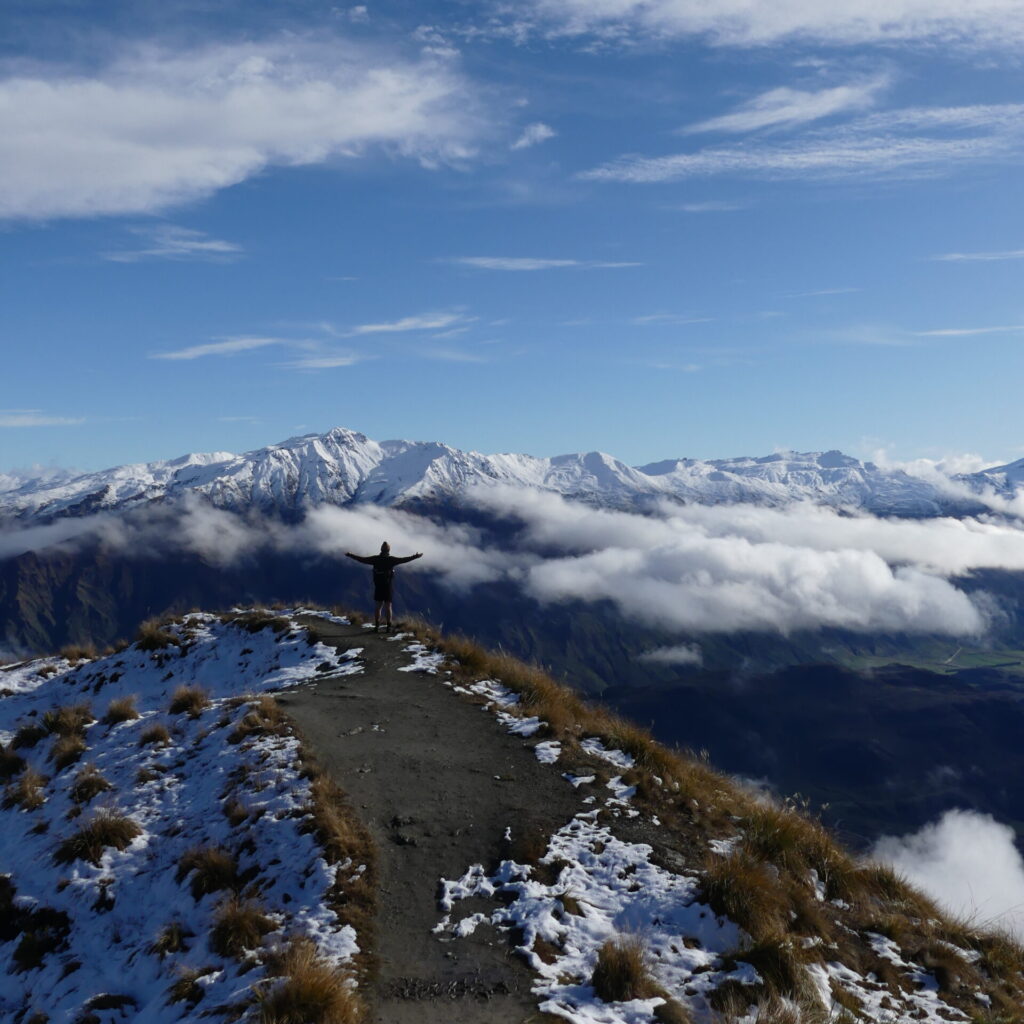
Kilometre Eight
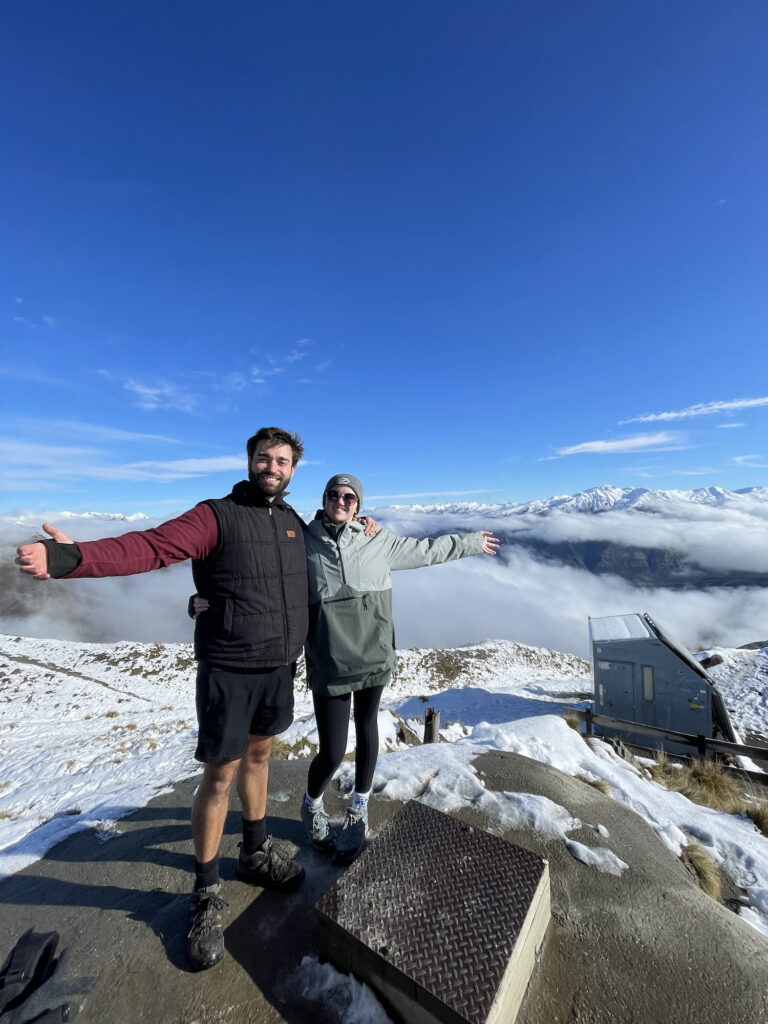
Congratulations! You’re at the top.
The hard work paid off and you can take in the most spectacular sights.
(As we’ve said before it was very cloudy when we got here. Some people sat hoping they would pass, we however took in the beauty for what it was clouds and all)
We made a snow man near to the top as the snow was too perfect not too and started our descent. Making sure to stop at the viewpoint for a proper lunch break this time.
The Real Peak
I have mentioned this, but it’s definitely worth mentioning again. At the 6.5km mark, you’ll reach some long drop toilets and the most awesome lookout point ever (assuming the weather is good). This is not the top! Keep going. You still have around half an hour of hiking to get there.
You’re so close, you might as well. It’s worth it we promise.
I also like to complete things if I can, so turning around 1.5km from the top was not really an option for us.
The Weather
You’re on the track for about 6 hours, a lot can change in that time.
Our experience was really cloudy going up. Don’t let this put you off! We’ve spoke to a few other people who did this hike when it was cloudy but they did what many people do which is sit and wait for the clouds to pass.
We didn’t see anything for ages, but when we did it was so worth it.
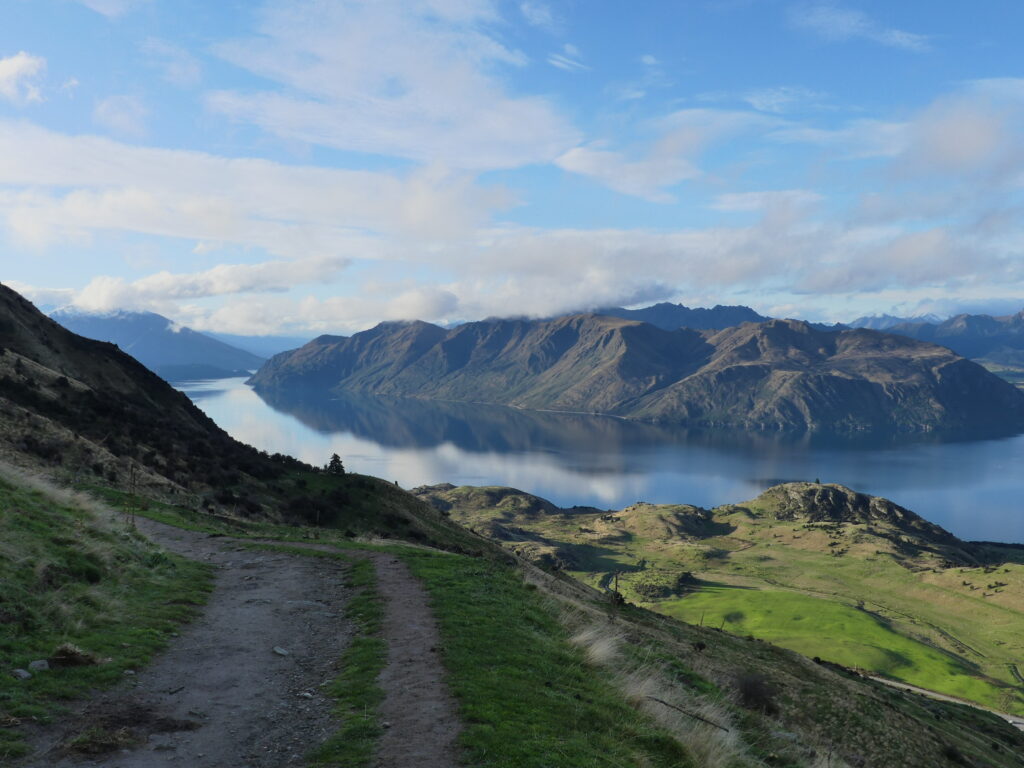
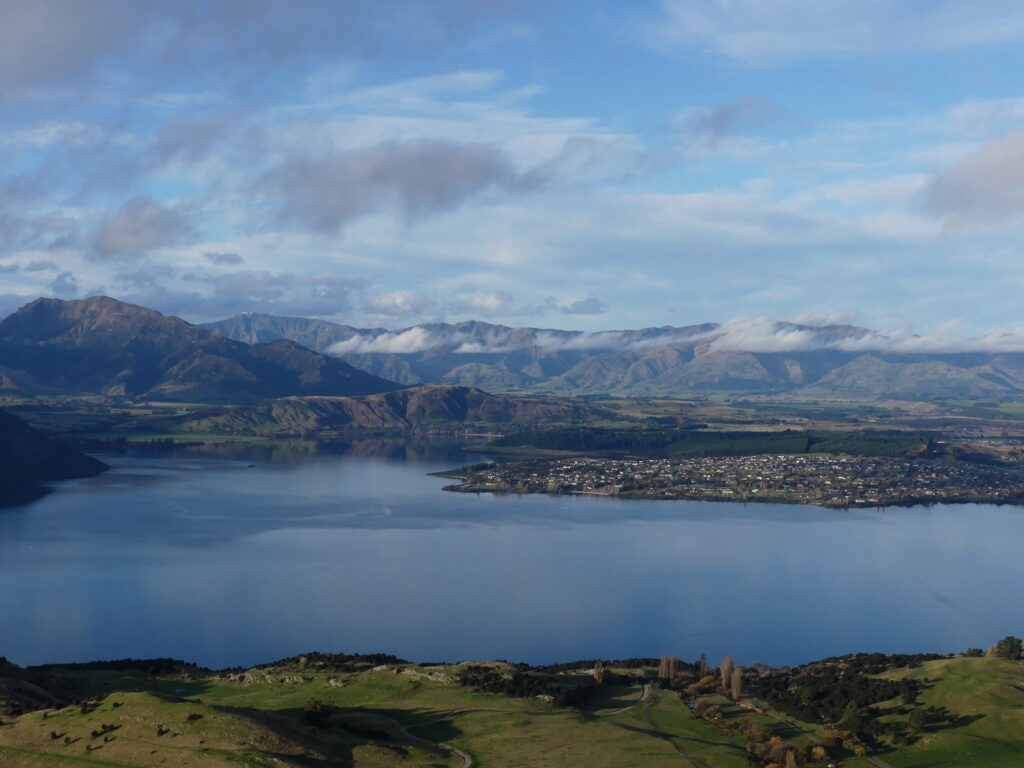
Our walk back down was so much clearer. I think we preferred this as we were facing the gorgeous views, rather than being in pain walking away from them.
We could see Lake Wānaka really clearly as well as all the surrounding hills and mountains.
You’re going up to an elevation of just over 1,500 metres, and there is no shelter from trees or bushes.
Best Time Of Year For Roys Peak
We did this hike in May, which is important as the seasonal weather conditions have a big impact on this hike.
December to February is summer in New Zealand, this would be a nice time to do the hike. But beware it may be quite busy and if you do it in summer and definitely take sun cream, hats, sunglasses and plenty of water as I imagine you’ll boil and the risk of heat/sun stroke are much higher. We were hot enough in April! (You also won’t get any snow.)
June to August is winter and the government actually recommends that you take heavy duty hiking gear such as crampons and an ice axe if you plan to do the hike in these months. We can see why as the snow was slippy enough as it was when we did it.
Going outside of these months would probably be best to experience more mild weather conditions and if you really do want a perfect day keep an eye on weather forecasts and allow a couple of days in Wānaka.
It’s also worth noting that the trail is closed between 1st October and 10th November for lambing. It’s private farmland and naturally the farmer has the rights to close it whenever, so keep an eye out.
What To Bring
- Water- More than you think you’ll need
- Plenty of high protein and high energy snacks
- A packed lunch
- Layers
- A camera!
We, or rather I, carried lots with us up this big old hill. I have this really cool bag that I love and it can carry a lot. So, I referred to myself as a donkey a few times to evoke some feeling of sympathy. Alas…
We packed about 4 litres of water. In hindsight, I don’t think 4 litres of water between us was enough. I certainly could have done with more, and Jess had a slight headache in the evening.
Our favourite high protein and high energy snacks are Tom and Luke’s Balls (oi oi).
We packed plenty of other food too, as we made over night oats (which we do regularly as it saves so much time and money on breakfast). Plus a few sugary sweets.
I also ended up carrying a lot of the layers in my bag. Conditions can change rapidly whatever time of year. Better to be safe than sorry. We didn’t need them when we were walking, but as soon as we stopped it was cold. When we were at the top there was snow so I’m glad we had about five or six layers each, plus hats and gloves which were essential.
Cameras and my Go Pro was a fun addition as it was stunning. Wānaka from above is seriously beautiful and there’s the all important viewpoint. Most people have phones which have decent cameras which do a good job.
Best Hike In New Zealand?
Roys Peak hike is often regarded as one of the best hikes in New Zealand. We can totally see why! In terms of views and effort, this certainly is our favourite so far.
We preferred this to the Hooker Valley Track at Mount Cook and the Queen Charlotte Track in the Marlborough Sounds.
Thank you for reading!
Leave a comment on this post or message us on Instagram.
This article may contain affiliate links. This means that we may earn a commission that keeps this website running at no extra cost to you.
Pingback: That Wanaka Tree: Why Is It Famous? - Jess & Ben Travel
Pingback: Franz Josef Hiking: Alex Knob Track - Jess & Ben Travel